When it comes to maintaining and customizing your mechanical keyboard, safely removing keycaps is essential. This detailed guide will walk you through the process of removing keycaps, provide maintenance advice, and discuss various customization options for your mechanical keyboard.
Understanding Keycap Removal Tools
Specialized tools
Specialized tools like plastic and wire keycap pullers are designed specifically for keycap removal. These tools help minimize the risk of damaging your keycaps or switches during the removal process. Using a specialized tool is the most efficient and safe method for removing keycaps.
DIY alternatives
If you don’t have a specialized keycap puller, you can use other tools like keys, paperclips, thin rulers, or flathead screwdrivers as makeshift keycap pullers. While not as efficient or safe as specialized tools, these DIY alternatives can still get the job done. To learn more about creating a DIY keycap puller, check out this guide.
When to use each tool
Specialized keycap pullers should be your go-to tool whenever possible. However, if you’re in a pinch and don’t have access to a specialized tool, DIY alternatives can be used with caution. Just be aware that using DIY alternatives may increase the risk of damaging your keycaps or switches.
How to Safely Remove Keycaps
Preparing your workspace
Before removing keycaps, ensure you have a clean, well-lit workspace. Place a soft cloth or mat on your work surface to protect your keycaps and switches from scratches or other damage. It’s also a good idea to have a container or tray to hold the removed keycaps, so they don’t get lost or damaged.
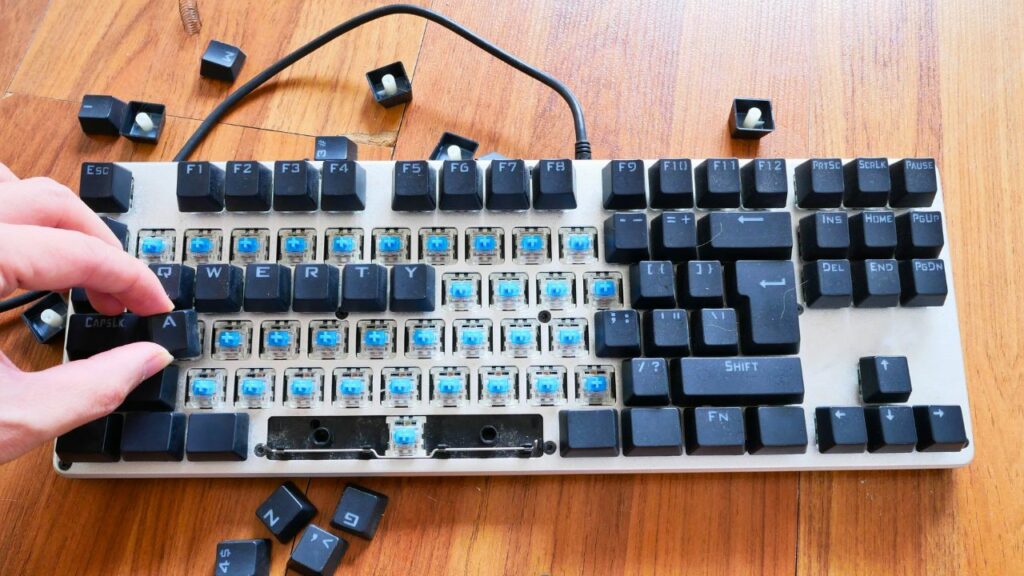
Using a keycap puller or DIY tool
When removing keycaps, use a tool to create enough space between the gaps of the keycap and the switch. Gently lift the keycap with even pressure to avoid damaging the switch or keycap. If using a DIY alternative, be extra careful not to apply too much force, as this could damage your keycaps or switches.
Handling larger keys (spacebar, shift)
Larger keys like the spacebar and shift keys require more finesse to remove. To avoid damaging these keys, it’s best to remove one side first before moving on to the other side. Be patient and gentle when removing larger keys to prevent damage.
Cleaning Your Keyboard After Keycap Removal
Removing debris
Once all keycaps are removed, you can clean the keyboard by blowing out debris with compressed air or by giving it an upside-down shake. Be gentle when shaking your keyboard to avoid damaging any internal components.
Cleaning keycaps
Clean your keycaps by wiping them down with a microfiber cloth and alcohol. Avoid using harsh chemicals or soaking the keycaps, as this can damage the keycap material and any printed legends on the keys.
Customizing Your Mechanical Keyboard
Installing aftermarket keycaps
After cleaning your keyboard and keycaps, you may want to install aftermarket keycaps like GMK keycaps to enhance the look and feel of your mechanical keyboard. To choose the right keycaps for your keyboard, take a look at this informative guide on selecting the perfect keycaps.
Replacing switches on a hot-swappable mechanical keyboard
Want to mix things up with your hot-swappable mechanical keyboard? Now could be the perfect moment to experiment with some fresh switches! Using a switch puller, you can gently remove the old switches and replace them with new ones for a whole new typing experience. Just keep in mind that this process requires some finesse to avoid damaging the keyboard’s PCB or switches. So take your time and proceed carefully to ensure a successful switch replacement.
Reinstalling Keycaps
Aligning the stem of the keyboard switch with the keycap
When reinstalling keycaps, first align the stem of the keyboard switch with the keycap. Make sure the keycap is oriented correctly, with the keycap’s legend facing the right direction.
Pressing down firmly
Once the keycap is aligned with the switch’s stem, press down firmly until the keycap is fully seated on the switch. Ensure the keycap is secure and doesn’t wobble when pressed.
Attaching stabilizing wires for long keys (if necessary)
Long keys like the spacebar and shift keys may require stabilizing wires to be attached to their respective keycaps. If your keyboard uses stabilizing wires, make sure to reattach them correctly during the reinstallation process.
Tips for Maintaining Your Mechanical Keyboard
Regular cleaning schedule
Establish a regular cleaning schedule to keep your mechanical keyboard in top shape. Depending on your usage, cleaning your keyboard every three to six months is a good rule of thumb. A clean keyboard not only looks and feels better but also performs more reliably.
Identifying signs of wear or damage
Regularly inspect your mechanical keyboard for signs of wear or damage. This includes checking keycaps for fading or chipping, switches for malfunctioning, and stabilizers for looseness or rattling. Addressing issues early can help prolong the life of your keyboard.
Proper usage and storage
Treat your mechanical keyboard with care by using it gently and avoiding impacts or spills. When not in use, store your keyboard in a protective case or cover to keep it safe from dust and damage.
Backlit Keycaps for Mac
If you’re a Mac user looking for backlit keycaps, there are plenty of options available. Check out this comprehensive guide to find the best backlit keycaps for your Mac mechanical keyboard.
Conclusion
Maintaining and customizing a mechanical keyboard is essential to its longevity and personal appeal. By following the guidelines presented here, you can elevate your keyboard to a trusted and stylish tool that can be used daily. While following the recommendations presented in this article, remember to be patient and pay close attention to detail when maintaining your mechanical keyboard to avoid damaging it. By dedicating time and effort to maintaining your mechanical keyboard, you’re not just prolonging its life but also elevating your typing experience, making every press of a key genuinely satisfying.