We understand just how transformative a good gaming keyboard can be for your gaming experience. When you’re navigating the world of best budget gaming keyboards, there’s one thing that always holds true. Just like any other piece of tech you cherish, your keyboard requires regular cleaning to maintain its peak performance.
The Basic Clean: Dusting and Vacuuming
As a keyboard enthusiast, you’re familiar with the occasional battle against crumbs, dust, and other tiny intruders that manage to sneak into your keyboard’s spaces. There’s a straightforward solution: confidently disconnect your keyboard from your computer, turn it upside down, and give it a firm yet gentle shake. It’s akin to patting the back of a friend who’s swallowed the wrong way – effective and harmless.
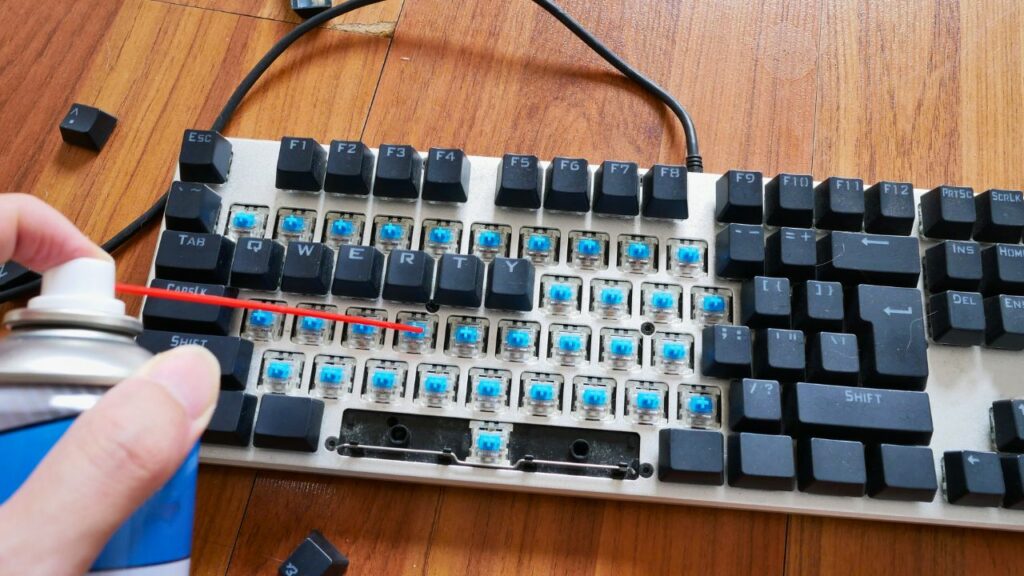
Now, there will be those stubborn particles playing hard to get. Just like in the latest strategy game you might be diving into, sometimes you need to bring out the big guns – or in this case, an air gun or mini vacuum cleaner. These trusty tools can be your allies in maintaining a clean and efficient keyboard.
Liquid Spills: Prevention is Better than Cure
As keyboard enthusiasts, we’ve all experienced that heart-pounding moment when our beloved beverage teeters precariously close to our much-cherished keyboard. In the unfortunate event of this nightmare turning into reality, stay calm! Immediately disconnect your keyboard and absorb as much of the spillage as you can with a dry cloth. Following this, invert your keyboard and leave it untouched for at least forty-eight hours. However, remember that most gaming keyboards are not designed to be waterproof. Hence, it’s always wise to exercise caution when liquids are within precarious proximity of them.
If you’re dealing with grime or sticky keys from dried spills, it’s time for a deep clean. You can use a microfiber cloth dipped in gentle cleaning liquid or a keyboard cleaning gel for this. The gel molds itself to the shape of your keyboard, getting into those hard-to-reach areas.
Keycaps: Handle with Care
Cleaning keycaps individually can be a daunting task, but it has its rewards. A keycap puller tool can save you a lot of time and effort. Remember to take a picture of your keyboard layout before you start pulling keys out. It’s easier than trying to remember where each one goes!
Once removed, soak your keycaps in soapy water or gently scrub them with dishwashing liquid and a brush. Avoid strong cleaners or bleach as they can damage the color and lettering on your keys. And remember, patience is key! Let them dry for at least two days before reassembling your keyboard.
Tools of the Trade: What You Need for a Keyboard Clean
Getting your hands on the right tools can make your keyboard cleaning adventure a breeze. So, what will you need in your arsenal? Let’s dive in and find out:
- A keycap puller tool – it’s an essential piece of kit to remove keycaps without causing damage..
- The Trusty Microfiber Cloth – We’ve all been there, haven’t we? You look down and realize your beloved keyboard has fallen victim to the unavoidable grime of everyday use. But don’t fret, because that’s where the humble microfiber cloth comes into play. Hailed for its gentle yet highly efficient cleaning prowess, this cloth can work magic on those keys.
- Keyboard Cleaning Gel – Fancy a cleaner, crumb-free typing experience? Then meet your new best friend – the keyboard cleaning gel! This squishy little miracle-worker is all about getting into those hard-to-reach corners, ensuring not a speck of dust eludes its grasp. Trust me, once you’ve given this gel a go, you’ll wonder how your keyboard ever survived without it.
- Your trusty dish soap – Not just a kitchen essential, dish soap also makes an excellent mild and non-abrasive cleaner for your keyboard’s keycaps. It’s perfect for giving them a gentle yet thorough wash. Remember, we’re dealing with delicate tech equipment here, and the last thing we want is to cause any damage.
- The Handy Air Gun or Mini Vacuum – When it comes to dealing with those persistent dust particles that love to hide between your keys, these tools can be real game-changers. They’re like the secret weapons of keyboard maintenance. No need for a major operation or disassembling your beloved keyboard. Just a gentle blast of air or a quick vacuum session and voila! Those pesky particles are gone, leaving you with a clean, happy keyboard.
Guide to Sparkling Clean Mechanical Keyboards: Step-by-Step
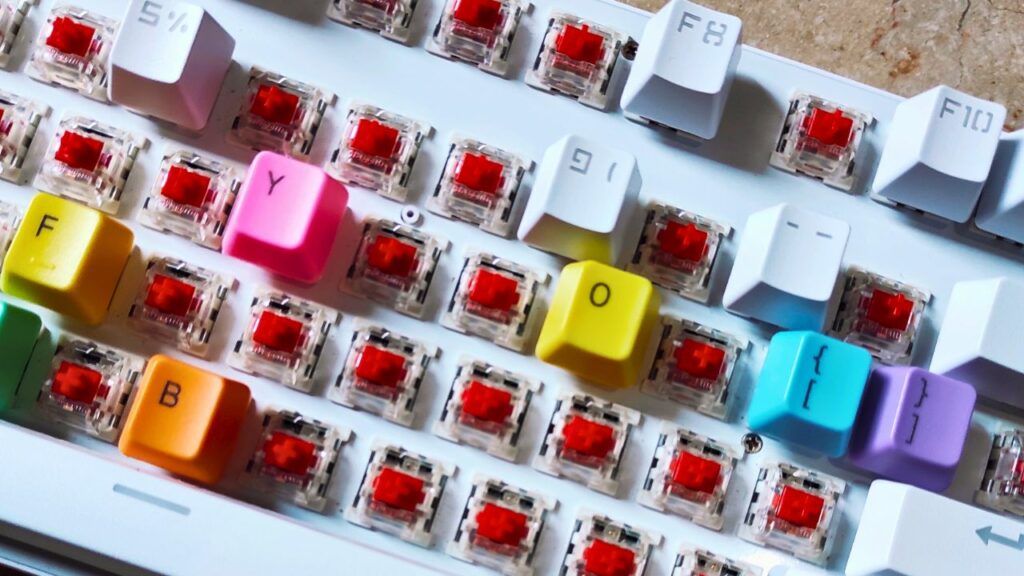
Mechanical keyboards, beloved by gaming enthusiasts for their tactile sensation, need a tad more TLC during clean up, thanks to their complex structure. Kicking things off, you’ll want to gently disassemble your keyboard. Get each keycap off with the aid of a keycap puller tool. Quick tip: Snap a cheeky photo before you dive in! This will save you from puzzling over where each key fits later on. Next, let your keycaps enjoy a warm bath in some soapy water while you give the keyboard base some attention with a damp cloth or cleaning wipe. Once every piece is squeaky clean, let them air dry thoroughly before you start the reassembly party.
Maintaining Your Keyboard: Prevention is Better Than Cure
Taking care of your keyboard doesn’t just keep it alive longer, it can also boost your gaming sessions by guaranteeing slick, responsive keys that are ready for action whenever you are. Curious to know how? Let’s dive in:
1. Let’s make it a personal routine – after finishing an exhilarating gaming session, give your keyboard a quick, loving wipe down. It’ll thank you for it!
2. Keep food and drinks away from your gaming station as far as possible.
3. Use a keyboard cover when not in use to prevent dust accumulation.
We all lead busy lives, but taking a few minutes each week to wipe down your keyboard can make a huge difference in its lifespan. A quick surface clean using a microfiber cloth and gentle cleaning liquid will keep germs and bacteria at bay.
FAQ
Can I wash my keyboard in the dishwasher?
No, this is not recommended. Most keyboards are not designed to withstand the heat or water pressure of a dishwasher. Stick to gentle hand cleaning instead.
Can I use rubbing alcohol on my keyboard?
Yes, but with caution. Rubbing alcohol evaporates quickly and doesn’t leave residue, making it good for cleaning electronics. However, it can potentially damage some plastics, so test it on an inconspicuous area first.
How often should I clean my keyboard?
It depends on usage, but for optimal performance and hygiene, a quick surface clean once a week and deep clean every few months is recommended.
Do I need to dry my keycaps before reassembling them?
Yes! It’s crucial to let them dry thoroughly for at least two days before reassembling your keyboard to avoid moisture damage.
Advanced Cleaning: For the Dedicated Gamer
If you’re up for it, an advanced clean every few months can do wonders for your gaming performance. This involves disassembling your keyboard, soaking the keycaps, wiping the plate and brushing around the switches. It sounds complicated, but once you know why mechanical keyboards are great for gaming, you’ll agree that they’re worth the effort.
In the diverse universe of gaming, a world teeming with trials, triumphs, and thrilling quests, there’s something we often overlook – the upkeep of our equipment. It’s just as crucial as refining your craft and mastering the game.